Running LENS
Choosing a Running Method
LENS can be run locally, in a hybrid local/cloud configuration, or entirely in the cloud.
Local
Manifest preparation
Launch LENS with your manifest:
raft run --project-id my-project-lens \
          --workflow lens \
          --version 1.9-dev \
          --species human \
          --input-data fastqs
raft run assumes human samples and FASTQ input, so the above is equivalent to:
raft run --project-id my-project-lens \
          --workflow lens \
          --version 1.9-dev \
LENS supports mouse samples with an additional requirement – MHC alleles must be provided when generating the manifest.
Run with --species mouse and --setup-only, then modify the config:
raft run --project-id my-project-lens \
          --workflow lens \
          --version 1.9-dev \
          --species mouse \
          --setup-only
Then launch the workflow:
raft run-workflow --project-id my-project-lens
Hybrid
The hybrid method runs LENS locally with data stored on Google Cloud. Add
--cloud and --profile to the local command:
raft run --project-id my-project-lens \
          --workflow lens \
          --version 1.9-dev \
          --cloud gs://<your_bucket> \
          --profile <your_gcp_profile>
Upload references to gs://<bucket>/references/cloud/, FASTQs to
gs://<bucket>/fastqs/<dataset>/, and your manifest to
gs://<bucket>/metadata/<dataset>/.
An appropriate Nextflow profile must be set up beforehand.
Cloud
To run LENS entirely in the cloud, use the RAFT Cloud Launcher.
Preparing Your Samples
LENS requires a manifest that defines the relationships among your samples, patients, and datasets. The manifest tells RAFT which samples belong together and what sequencing data each sample contains.
The organizational hierarchy follows:
Sample ⊂ Group ⊂ Patient ⊂ Dataset
Samples belong to groups (for multi-timepoint analyses), groups belong to patients, and patients belong to datasets.
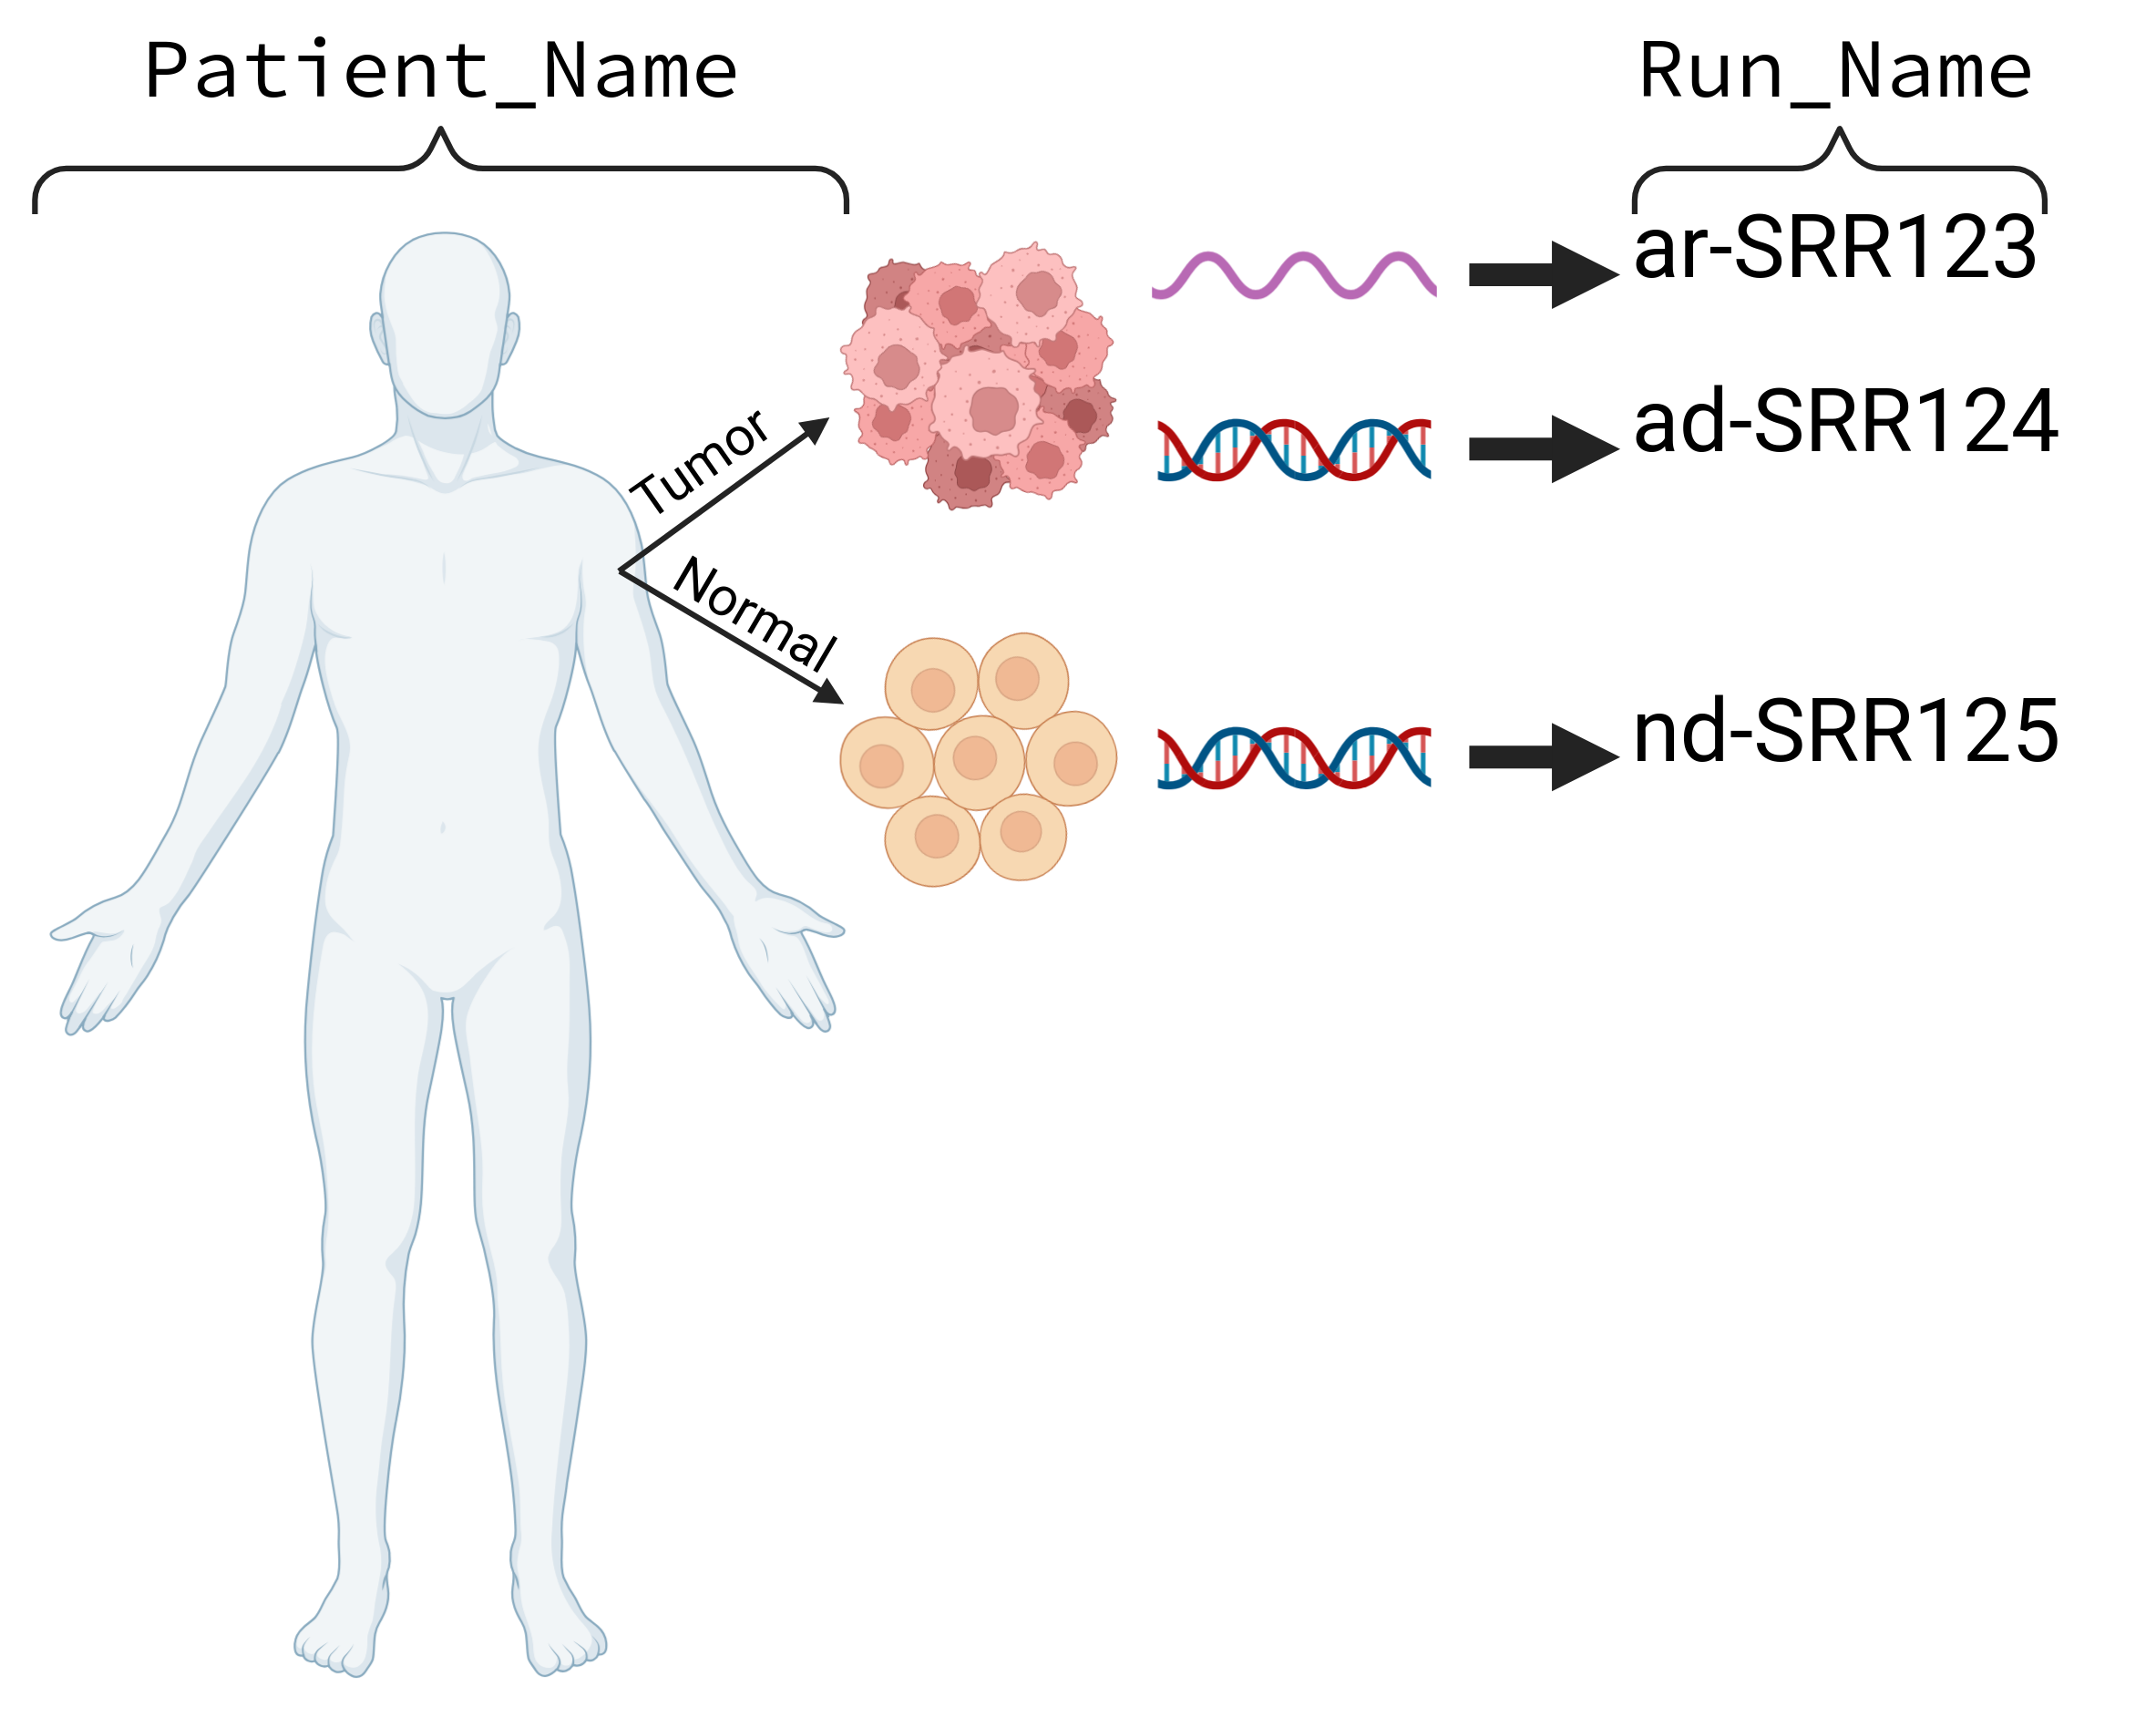
A LENS manifest requires at least one tumor DNA sample, one normal DNA sample, and one tumor RNA sample per patient. A reduced analysis (without SNV or InDel pMHCs) can be run with only tumor RNA.
Using the Manifest Generator
The easiest way to create a manifest is through the RAFT Manifest Generator — a browser-based form with autocomplete, real-time validation, and workflow-aware requirements.
Launch it by starting a new project without a --manifest argument:
raft run --project-id my-project-lens --workflow lens --version 1.9-dev
The Manifest Generator opens in your browser. From there you can:
Select a workflow — choose “LENS (Tumor Antigens)” from the dropdown.
Add samples — fill in Dataset, Patient Name, Sample Type, Run Name, and File Prefix for each sample.
Review — the Sample Overview section organizes samples by patient and group, with color-coded type badges.
Save — click “Save to RAFT” to save the manifest to your project.

The Sample Type dropdown auto-sets the Run Name prefix and Sequencing Method:
Tumor DNA → prefix
ad-, methodWESNormal DNA → prefix
nd-, methodWESTumor RNA → prefix
ar-, methodRNA-SeqNormal RNA → prefix
nr-, methodRNA-Seq
The File Prefix field autocompletes from available FASTQ files in your project directory and validates that the files exist.
Validation warnings appear in real time — for example, “Missing for LENS: Normal DNA” if a normal DNA sample has not been added for a patient.

A hosted version of the Manifest Generator is also available for creating manifests outside of a project:
Creating a manifest from the command line
If you prefer the command line, RAFT can generate a starter manifest:
raft manifest-template --output my_manifest.tsv
This creates a TSV file with example rows for a typical LENS run. To generate a header-only template:
raft manifest-template --no-examples --output my_manifest.tsv
For the full column reference, sample naming conventions, complex sample sets with Groups, and manifest validation, see Manifest Specifications.
Supplying the manifest
Once you have a manifest, pass it when starting a project:
raft run --project-id my-project-lens --workflow lens --version 1.9-dev --manifest my_manifest.tsv
Manifest files must be placed in RAFT’s inputs/metadata directory to be
discovered automatically.
Using the Config Generator
The recommended way to run LENS is through RAFT’s interactive Config Generator. When you start a new project without a workflow profile, RAFT opens a browser-based configuration tool that lets you select tools, set parameters, and modify references — all without editing configuration files directly.
Use --workflow-profile standard to accept defaults and skip manual
configuration:
raft run --project-id my-project-lens --workflow-profile standard
Without a workflow profile, RAFT opens the Config Generator:
raft run --project-id my-project-lens
After saving your manifest (see Preparing Your Samples), RAFT opens the Config Generator.

The Config Generator walks you through:
Workflow selection — choose LENS, species (human or mouse), starting data (FASTQs or BAMs), and version.
Runtime limits — set max CPUs and memory.
Tool selection — expand accordion sections to pick tools for each step (e.g.,
fastportrimmomaticfor trimming,mutect2orstrelka2for variant calling).Parameters — edit tool-specific parameters directly in the form.
References — modify reference file paths if needed.
Methods description — an auto-generated methods section based on your selections, ready to copy into manuscripts.

After configuration, click Save to RAFT to save and launch the workflow, or Copy to CLI to get the command for terminal use.
Note
Intermediate files are deleted automatically after a successful run. Use
--keep-intermediates if you need to retain them.